Managing streams in Qosifire
A live stream is the basic unit which is checked in Qosifire. The web console allows adding and changing streams settings for further check, view their stats and send notifications about significant events to users.
Also,learn more about Getting started with Qosifire to see how you can begin using it.
To view the list of streams and manage them, click on Streams link in left navigation panel.
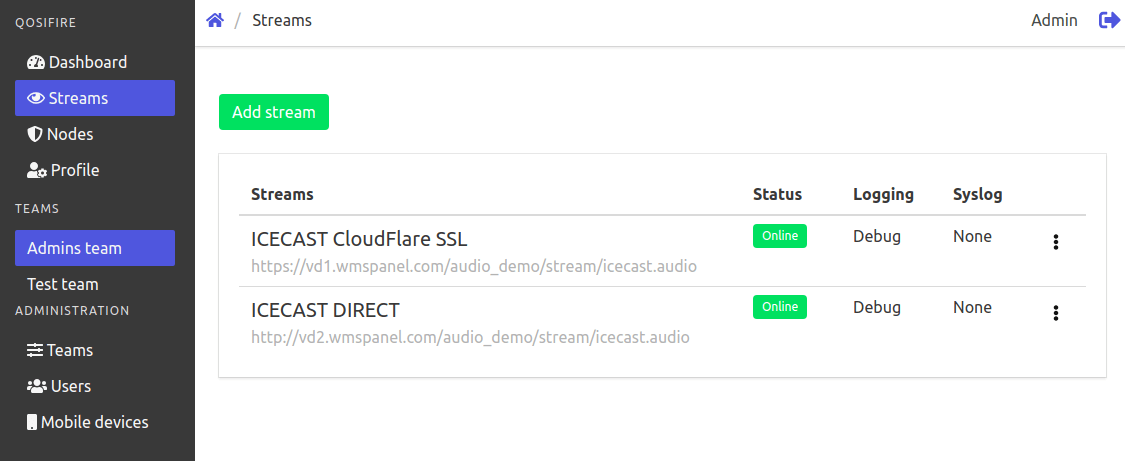
The opened page shows the list of streams if they were added. Each stream shows its name, URL, current status and logging settings. All other setting can be found in stream edit dialog by clicking on triple dots on the right side. The same settings are used during the setup of a new stream.
To add new stream for checking, click on Add stream button on top, this will bring a dialog shown below.
It has 3 tabs, each representing its set of fields. More details on some of those fields will be explained in specific separate articles.
Stream settings
This tab defines general settings.
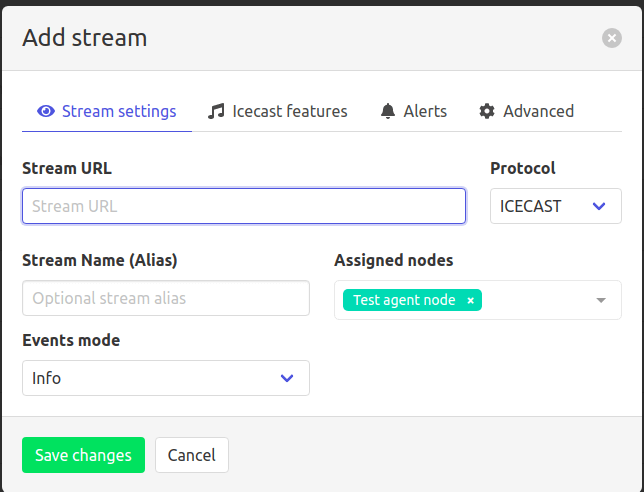
- Stream URL is the full address of HLS or Icecast stream to be checked.
- Protocol drop-down list allows selecting what type of protocol (HLS or Icecast) is monitored.
- Stream name is used for identifying the stream inside of web console.
- Assigned nodes field allows selecting which agent nodes will be used for checking the stream status.
- Events mode defines the level of details which will be recorded for all events. The "Debug" level is more verbose than "Info".
Icecast features
These are settings specific to Icecast audio quality monitoring. Readdetailed article about Icecast-related properties.
Alerts
Those settings define how your users are notified about issues. Readdetailed article about alerts setup.
Advanced settings
This tab is used for admin-specific settings.
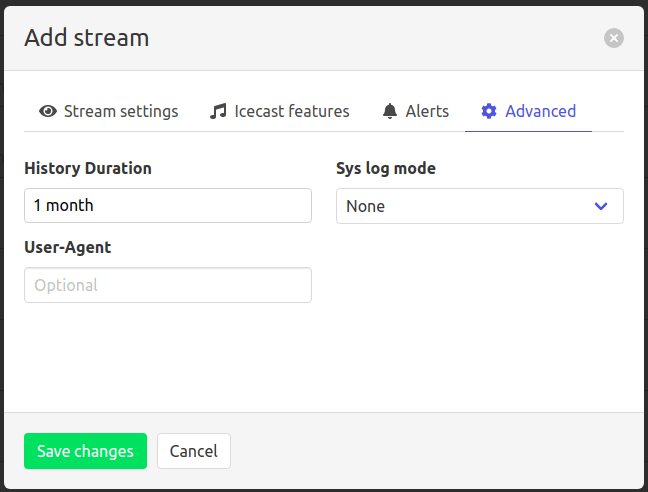
- History Duration field defines how long the statistics and events data will be stored. The data storage is located on the agent node side so it's a matter of your storage planning to define this number.
- Sys log mode is defined for agent node application debugging and monitoring.
- User-Agent is the optional field where you can define what user agent name will be used when accessing stream via its URL. By default our agent will use "Qosifire" and agent software version as its User-Agent.
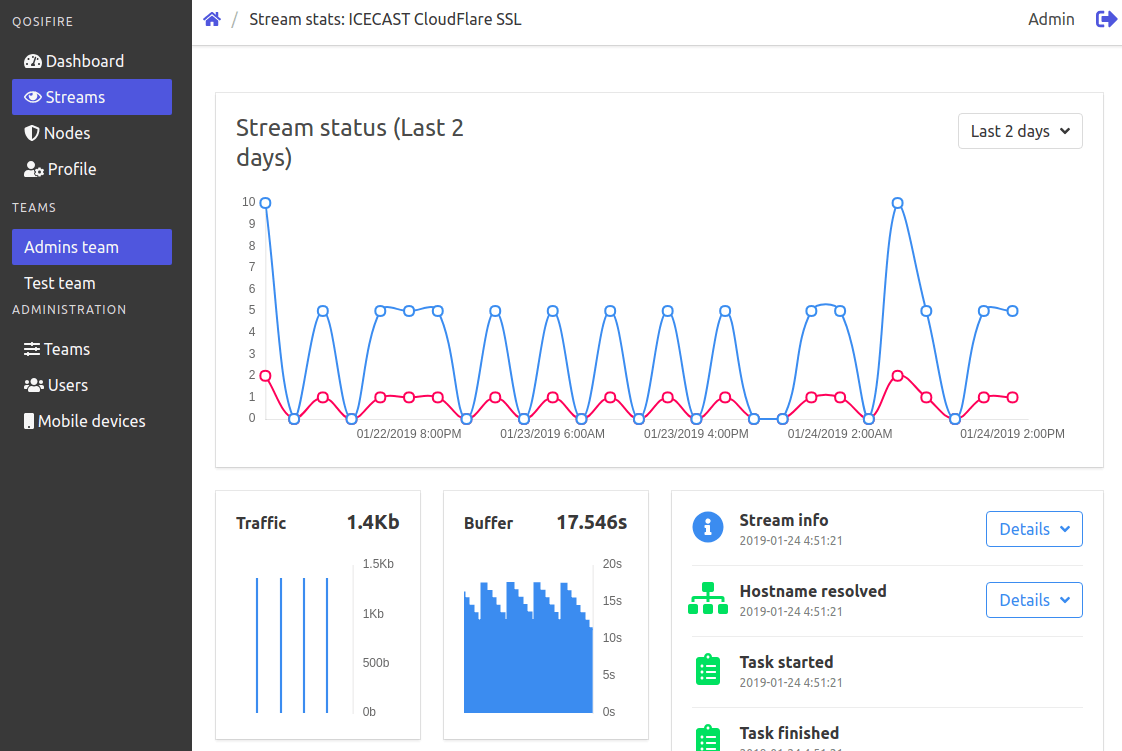
Saving settings will apply them to assigned nodes and the check-over process will be started.
Then the stream is set up and the check-over is started, you'll be able to click on it in the streams list and view its stats and events list as shown below. For more information about this functionality, check respective article in our knowledge base.
If you'd like to pause monitoring some stream, just point to stream in streams' list, you will see icons on the right - Pause, Edit and Delete. So just click on Pause, this will un-assign all nodes from the stream and initiate "Task finished" event. You won't get any notifications going forward. If you'd like to resume, click on Play, this will assign a stream back.